
 English
Why do 3D printed parts leak water? How can capillary action be prevented to make printed parts trul
In 3D printing applications, many people encounter a seemingly strange problem:
The printed part has no obvious holes, so why does it still slowly leak water when filled with water?
Especially for products such as water tanks, liquid reservoirs, pipe fittings, cooling channels, pump bodies, and sealing structures, the surface looks complete after printing, but water seepage occurs after a period of time.
One important reason for this is the micro-gaps and capillary action within the 3D printed structure.
1. Why do 3D printed parts leak water?
Take common FDM 3D printing as an example.
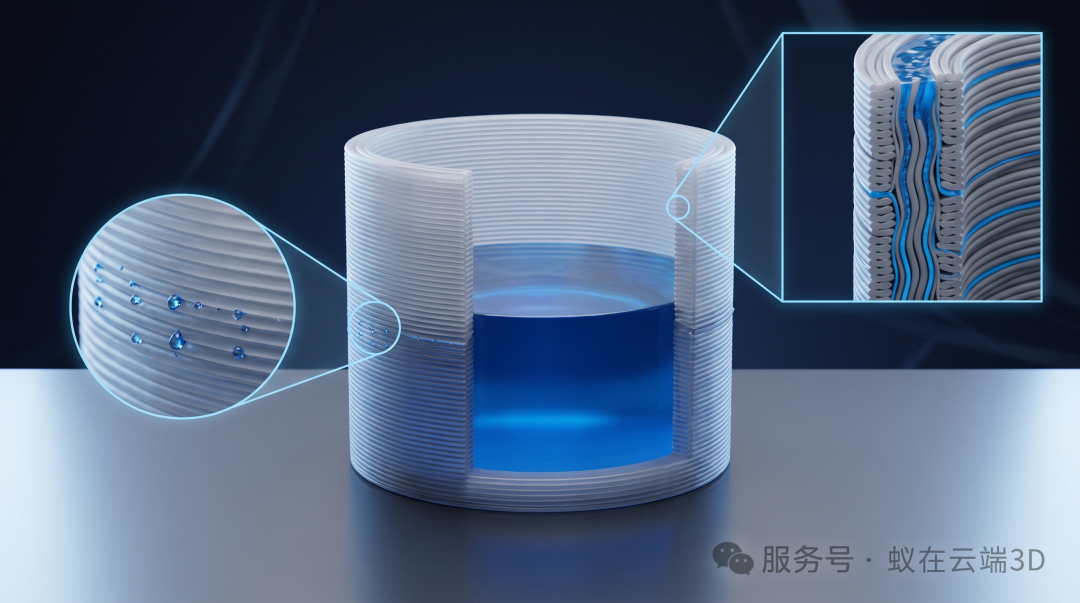
FDM printing stacks molten material layer by layer through a nozzle. Although a complete part is ultimately formed, during the actual printing process, the fusion between lines and between layers is not always 100% seamless.
When extremely fine gaps exist at these locations, water can slowly move along these channels.
This is what we often call: capillary action.
In simple terms, capillary action means that liquid can move along extremely narrow gaps. Even if the gap is so small that it is invisible to the naked eye, water can still slowly seep through.
Therefore: “It doesn't leak” to the naked eye does not mean the printed part is truly waterproof.
2. What situations are likely to cause 3D printed parts to leak water?
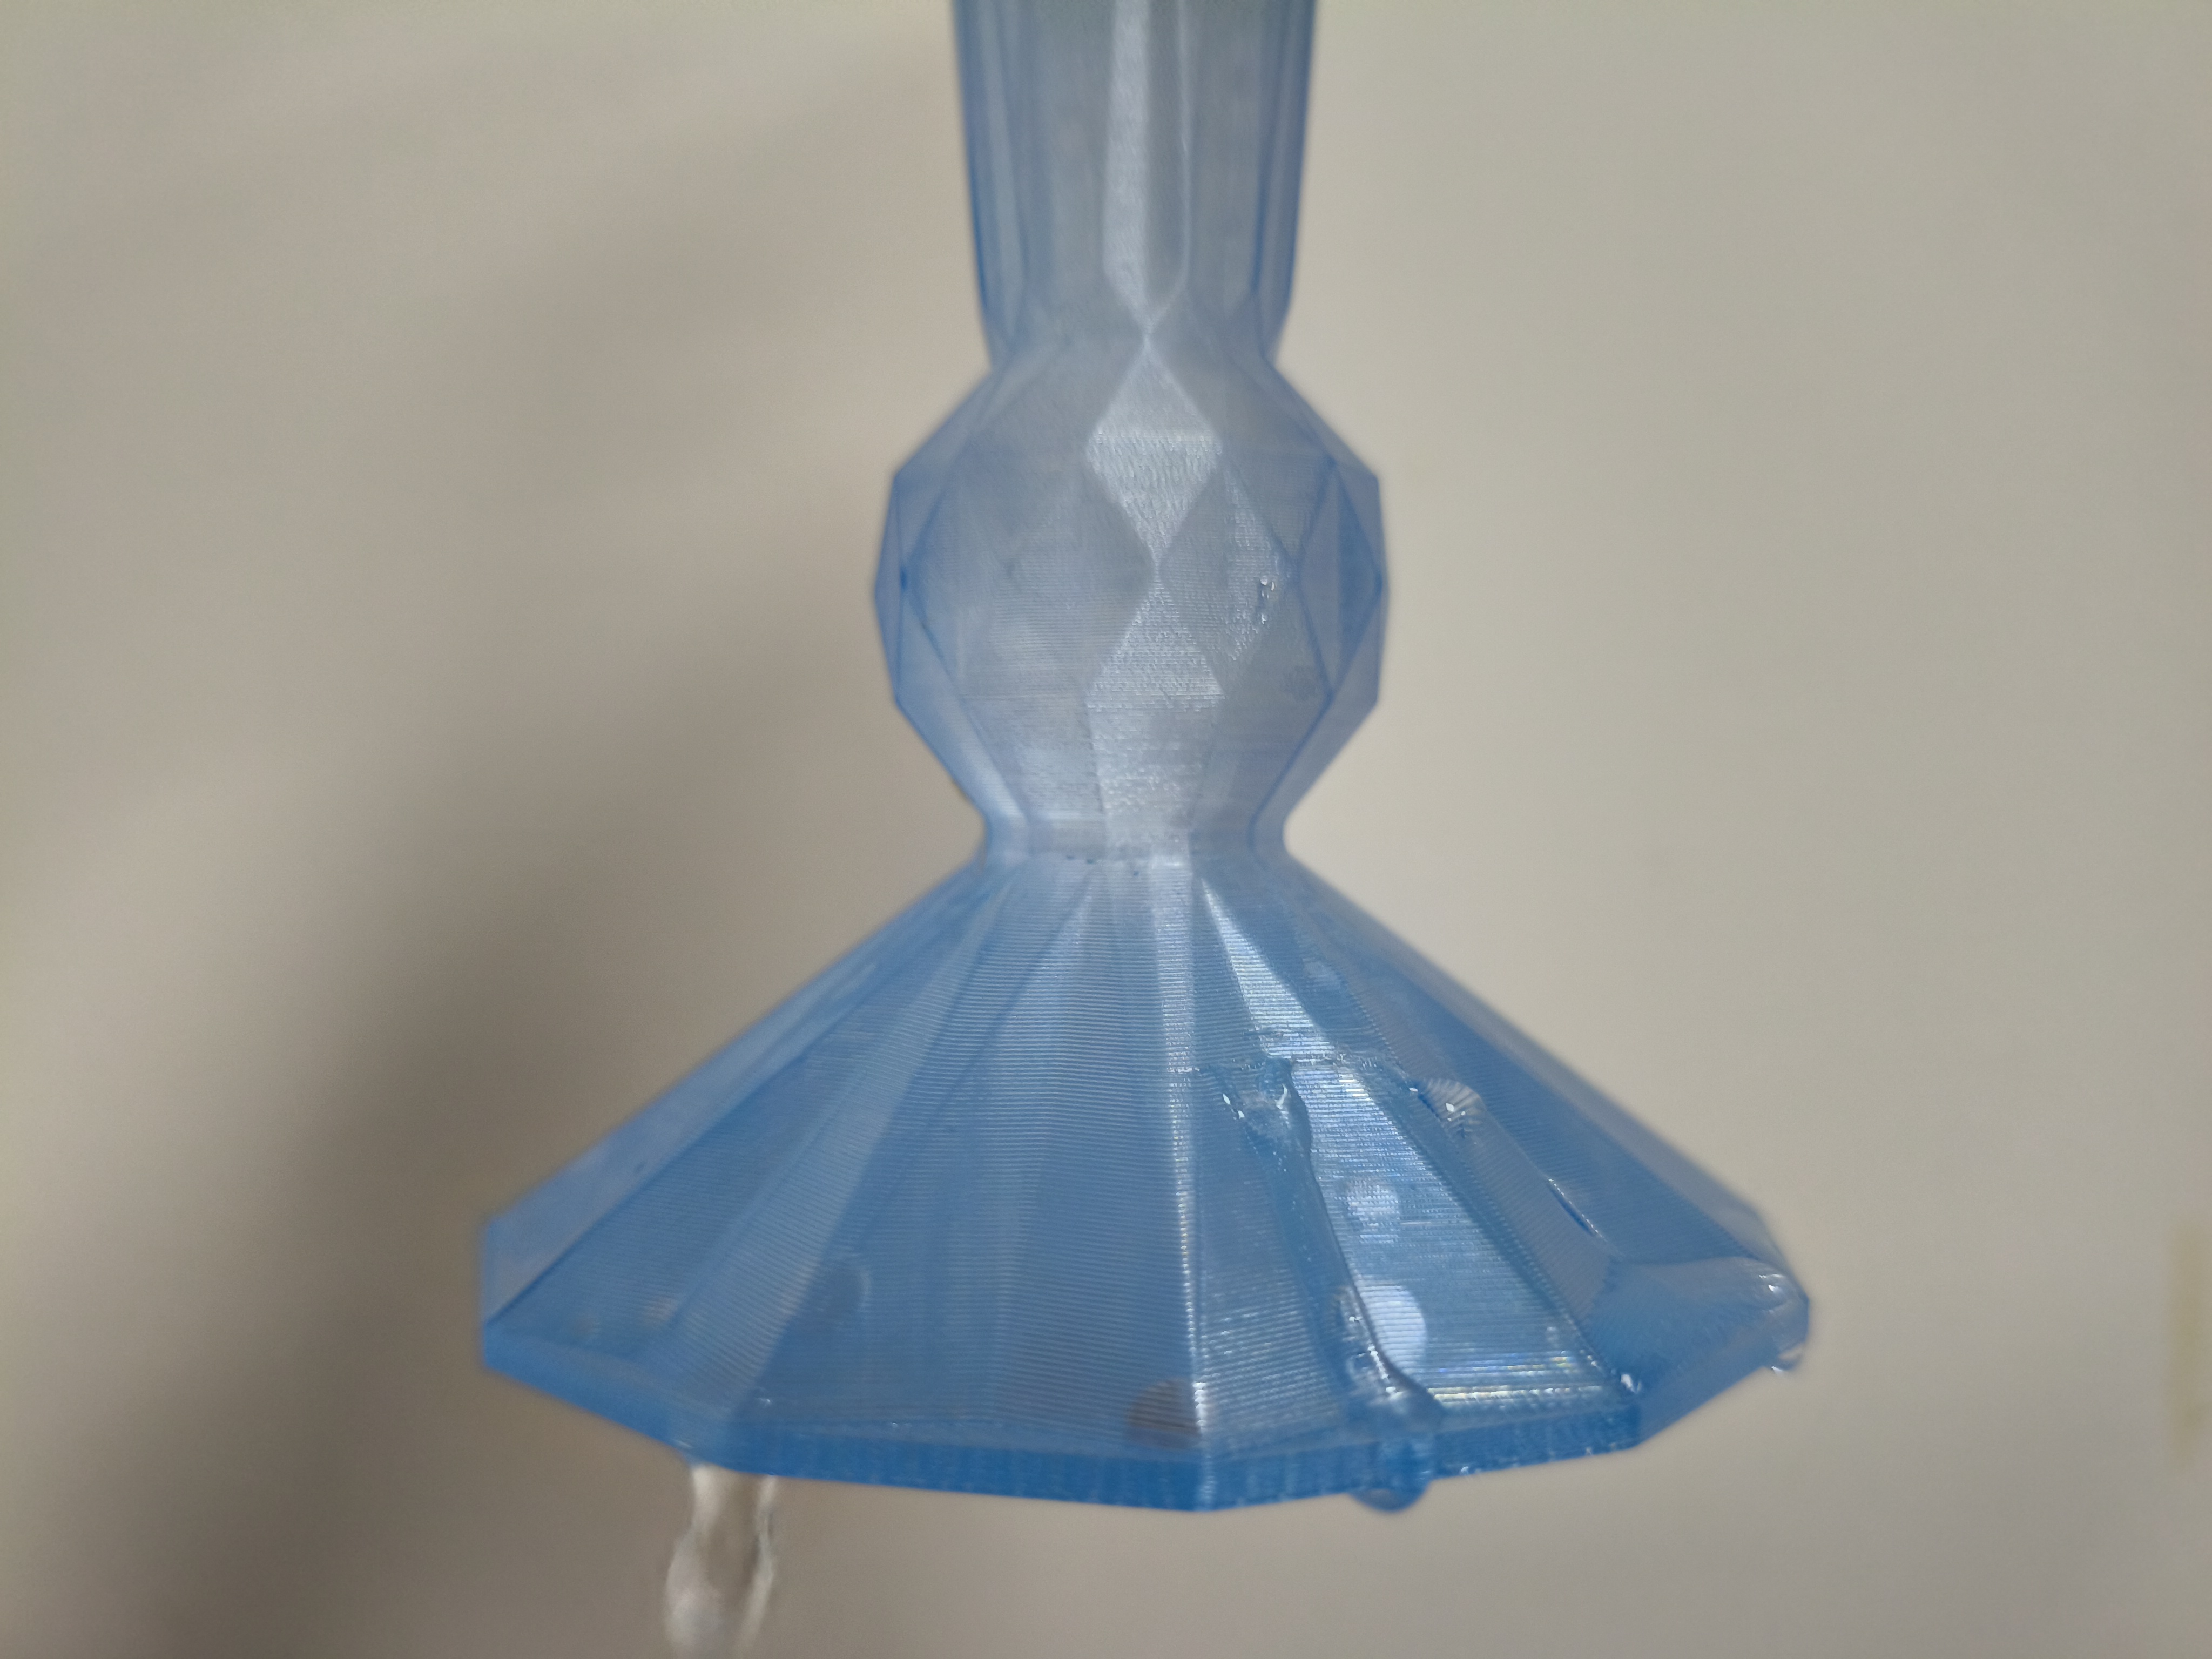
1. Micro-gaps between layers
This is one of the most common causes of water seepage in FDM printed parts.
If the printing temperature is insufficient, the extrusion volume is insufficient, or the printing speed is too fast, the layers may not fully fuse with each other.
When continuous micro-channels exist inside the part, water can slowly seep out along these channels.
2. Insufficient extrusion flow
If under-extrusion occurs, gaps are easily left between printed lines.
Common signs include:
Fine gaps on the surface
Incomplete top layers
Pinholes on the outer wall
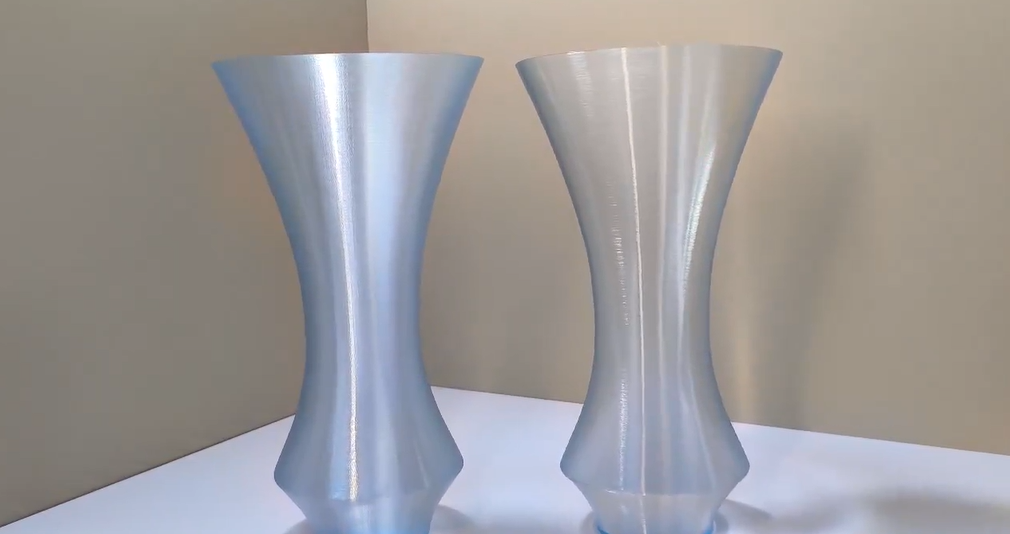
Thin walls that are translucent
Chronic seepage after filling the container with water
Therefore, waterproof printing is not simply about increasing infill density; the first priority is to ensure stable actual extrusion volume and a continuous, dense outer wall.
3. Outer wall too thin
If the model itself has only a very thin outer wall, even with normal printing parameters, leakage may occur due to local defects.
For parts that need to be waterproof, the following can be appropriately increased based on the actual application:
Number of outer walls + wall thickness + top and bottom thickness.
For functional parts, reasonable structural design is often more important than simply increasing infill density.
4. Printing temperature too low
If the material is not fully melted, insufficient interlayer bonding may result.
Especially when printing some engineering materials temperature, chamber temperature, and material condition all affect interlayer bonding.
Therefore:
Temperature is neither as low as possible nor as high as possible.
The appropriate printing temperature should be selected based on the specific material, and a stable process window should be found through testing.
5. Printing speed too fast
Printing speed that is too fast may lead to:
Material not having enough time to fully fuse
Unstable extrusion
Reduced interlayer bonding
Defects at corner positions
If the part has high requirements for waterproof performance, the outer wall printing speed can be appropriately reduced to prioritize structural integrity.
3. How to reduce capillary water seepage in 3D printed parts?
To make 3D printed parts more waterproof, one core principle can be remembered:
“Dense + Fusion + Sealing”
Method 1: Increase the number of outer walls
For ordinary models, 2 to 3 outer walls may be sufficient.
But for functional parts that need to be waterproof, the number of outer walls can be appropriately increased based on part size and material, for example:
4 to 6 walls or even more.
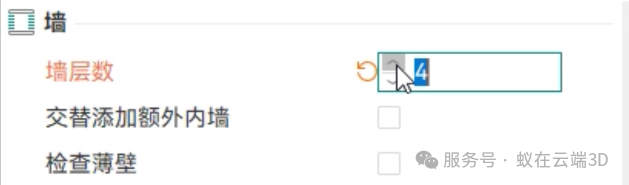
This reduces the probability that a defect in a single printed layer will directly form a through-channel for leakage.
Method 2: Increase infill density
In addition to increasing the outer walls, the following can also be appropriately increased:
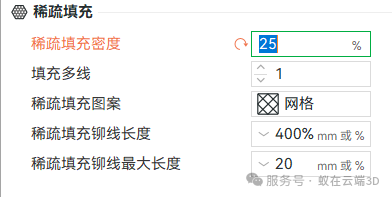
Top layer thickness
Bottom layer thickness
Infill density
Local wall thickness
However, note that:
Higher infill density is not always better.
If true waterproofing is required, priority should be given to the continuity of the outer wall and the overall structure, rather than simply raising the infill density to 100%.
Method 3: Optimize printing temperature
Appropriately increasing the nozzle temperature can improve interlayer fusion for some materials.
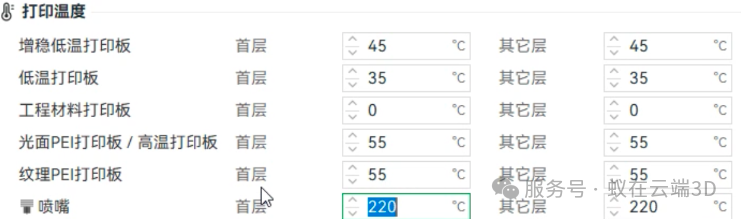
But it must be noted: do not blindly raise the temperature for the sake of waterproofing. Excessive temperature may cause:
Stringing
Deformation
Reduced dimensional accuracy
Reduced surface quality
Material thermal degradation
The best approach is to adjust parameters based on the material manufacturer's recommendations, then determine final parameters through actual printing tests.
Method 4: Appropriately reduce printing speed
For parts that need to be waterproof, the quality of the outer wall is especially important.
Appropriately reducing the outer wall printing speed allows the material more time for full melting and fusion, thereby reducing micro-gaps.
Therefore, if a model:
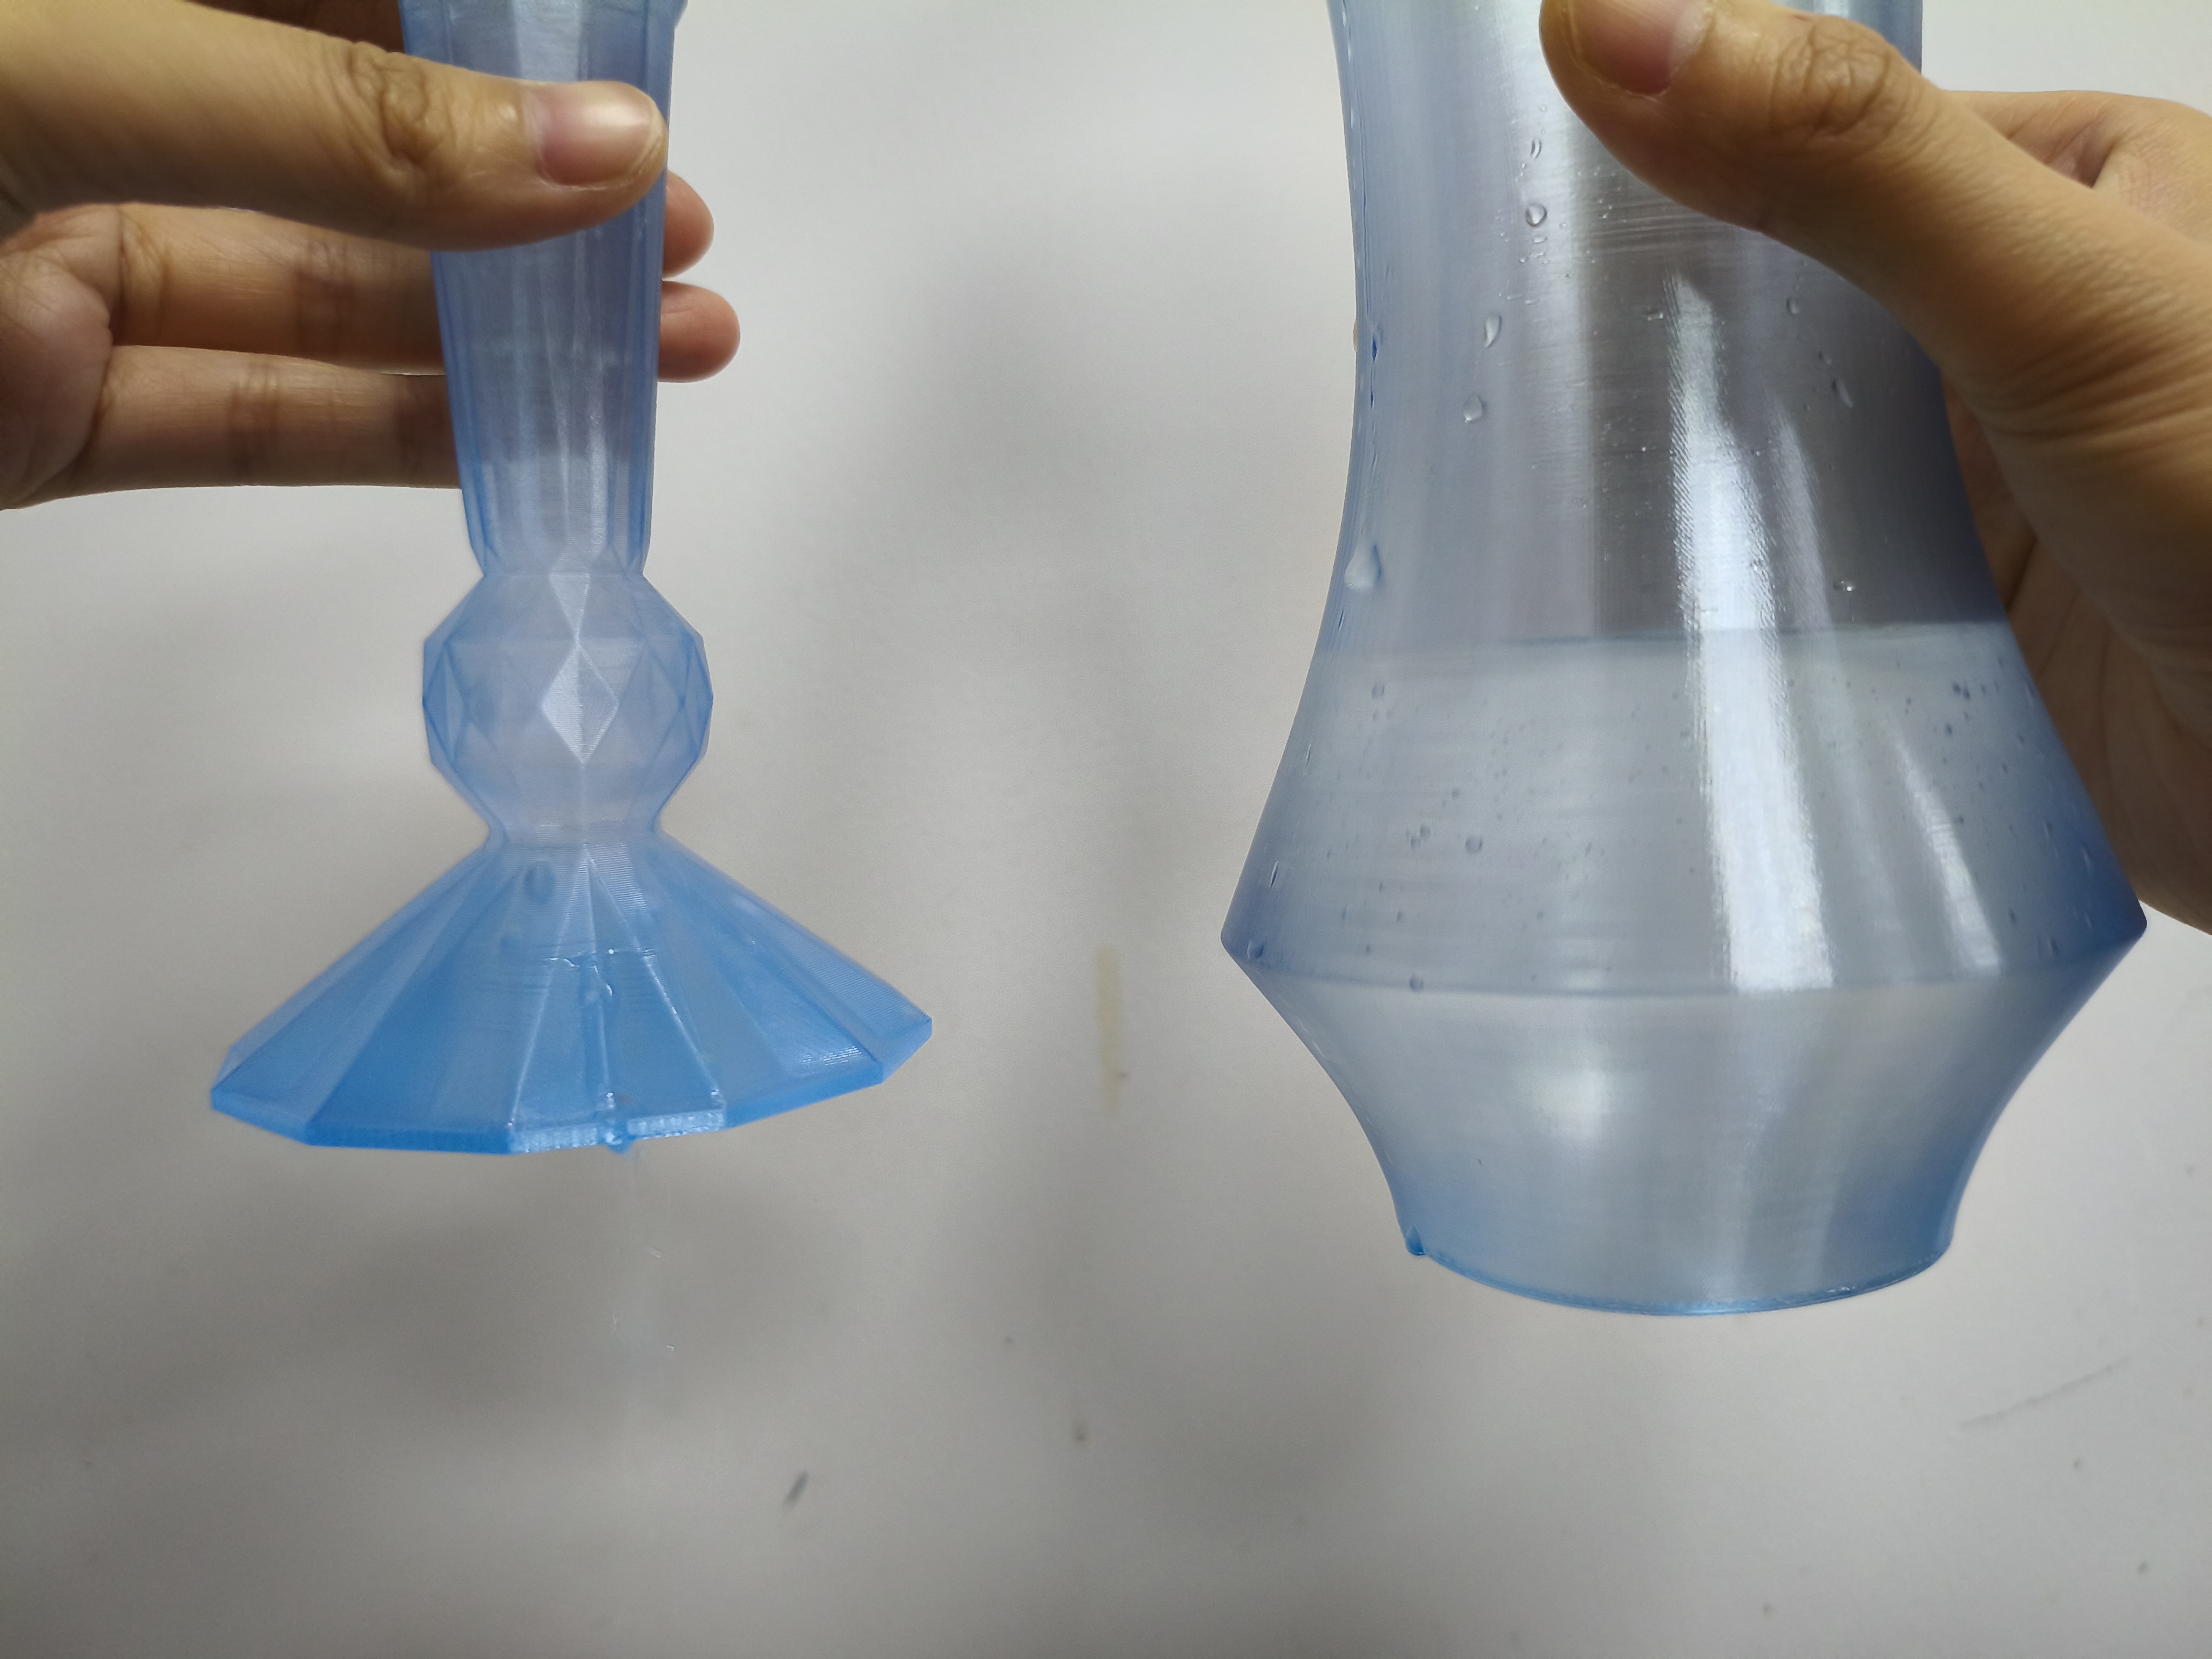
prints successfully under normal settings but leaks after being filled with water
the following should be checked first:
Flow rate → Temperature → Outer wall → Printing speed → Interlayer fusion.
4. SLA 3D printing can it leak water?
Many people think: “Models printed with SLA have very smooth surfaces, so they certainly won't leak.”
Actually, this is not the case. SLA 3D printing can also experience seepage.
Common causes include:
Wall thickness too thin
Underexposure
Insufficient local curing
Defects in support areas
Micro-pores inside the model
Unreasonable hollow structure design
Insufficient cleaning or post-curing
Especially for hollow models, special attention should be paid to drain holes and residual resin inside.
If residual liquid or resin inside is not drained in time, it may not only affect the strength of the model, but may also cause subsequent seepage and cracking.
5. 3D printing waterproofing is not just “printed without leaking”
There is a very important concept here: waterproof ≠ long-term watertight ≠ pressure-tight seal. For example, if a printed part holds water for 10 minutes without leaking, it does not prove that it can be used as a long-term water storage container.
In practical applications, the following also need to be considered:
Water pressure
Service time
Temperature
Material water absorption rate
Interlayer strength
Environmental changes
Sealing methods
Long-term aging
If the part is used in water pumps, water lines, cooling systems, or pressure-bearing structures, actual watertightness or pressure testing is recommended.
6. Post-processing can further improve waterproof performance
If printing parameters alone cannot meet the waterproof requirements, post-processing can be added.
Common methods include:
① Epoxy resin sealing
Forms a continuous sealing layer on the surface of the printed part, filling micro-pores.
Suitable for:
Water tanks
Containers
Functional models
Test parts
② Waterproof coatings
Selecting appropriate waterproof coatings based on different materials can further improve surface sealing performance.
Especially suitable for products that require both good appearance and waterproofing.
③ Structural sealing
The genuine industrial functional components can also be made using:
O-rings, gaskets, thread seals, adhesive seals, and other methods.
This approach is often more reliable than relying solely on the printed surface for waterproofing.
7. How to print a truly waterproof 3D printed part?
If you need to produce a waterproof 3D printed part, you can follow the process below:
① Design the model reasonably
↓
② Increase reasonable wall thickness
↓
③ Increase the number of outer walls
↓
④ Optimize printing temperature and flow rate
↓
⑤ Appropriately reduce outer wall printing speed
↓
⑥ Print test samples
↓
⑦ Conduct watertightness testing
↓
⑧ Add sealing coatings if necessary
↓
⑨ Conduct long-term or pressure testing on the final product
This is more reliable than simply modifying a single printing parameter.
Different printing technologies require different waterproofing methods, so the same set of parameters cannot solve all problems.
8. A simple evaluation method
If your 3D printed part needs to be waterproof, you can first perform a very simple test:
Step 1: Fill with water and observe whether there is obvious leakage in a short period of time.
Step 2: Wipe the outer surface dry, let it sit for a while, and observe again.
Step 3: Inspect seams and thin-wall areas, focusing on: corners, threads, holes, bottom, layer lines, and joint positions.
Step 4: Increase the test duration. No leakage in a short time does not mean no leakage over a long time.
For functional products, more stringent watertightness testing should be carried out based on actual service conditions.
Summary
Water leakage in 3D printed parts is often not caused by a visible large hole, but by micro-pores and continuous seepage channels generated during the printing process.
To reduce capillary action and improve waterproof performance, four aspects can be addressed:
Design: reasonably increase wall thickness, optimize structure and sealing positions.
Printing: control temperature, flow rate, speed, and number of outer walls to improve interlayer fusion and overall density.
Post-processing: use epoxy resin or specialized waterproof coatings for secondary sealing when necessary.
Testing: verify actual performance through watertightness, airtightness, and pressure tests.
In summary, it can be concluded in one sentence: 3D printing waterproofing is not solved by a single parameter, but is the combined result of “structural design + printing process + post-processing + testing and verification.”
For ordinary display models, basic water resistance is sufficient; for functional parts such as water tanks, pipes, pump bodies, and cooling systems, targeted process verification is required based on actual working pressure, temperature, and service life.
Truly reliable waterproof 3D printing is not about “looking like there are no holes,” but about maintaining a stable seal even after testing.
If you have any other questions about 3D printing, leave a comment below or follow us and join our community to discuss together!


